Add new package
There are five steps to define a membership package:

Basic details
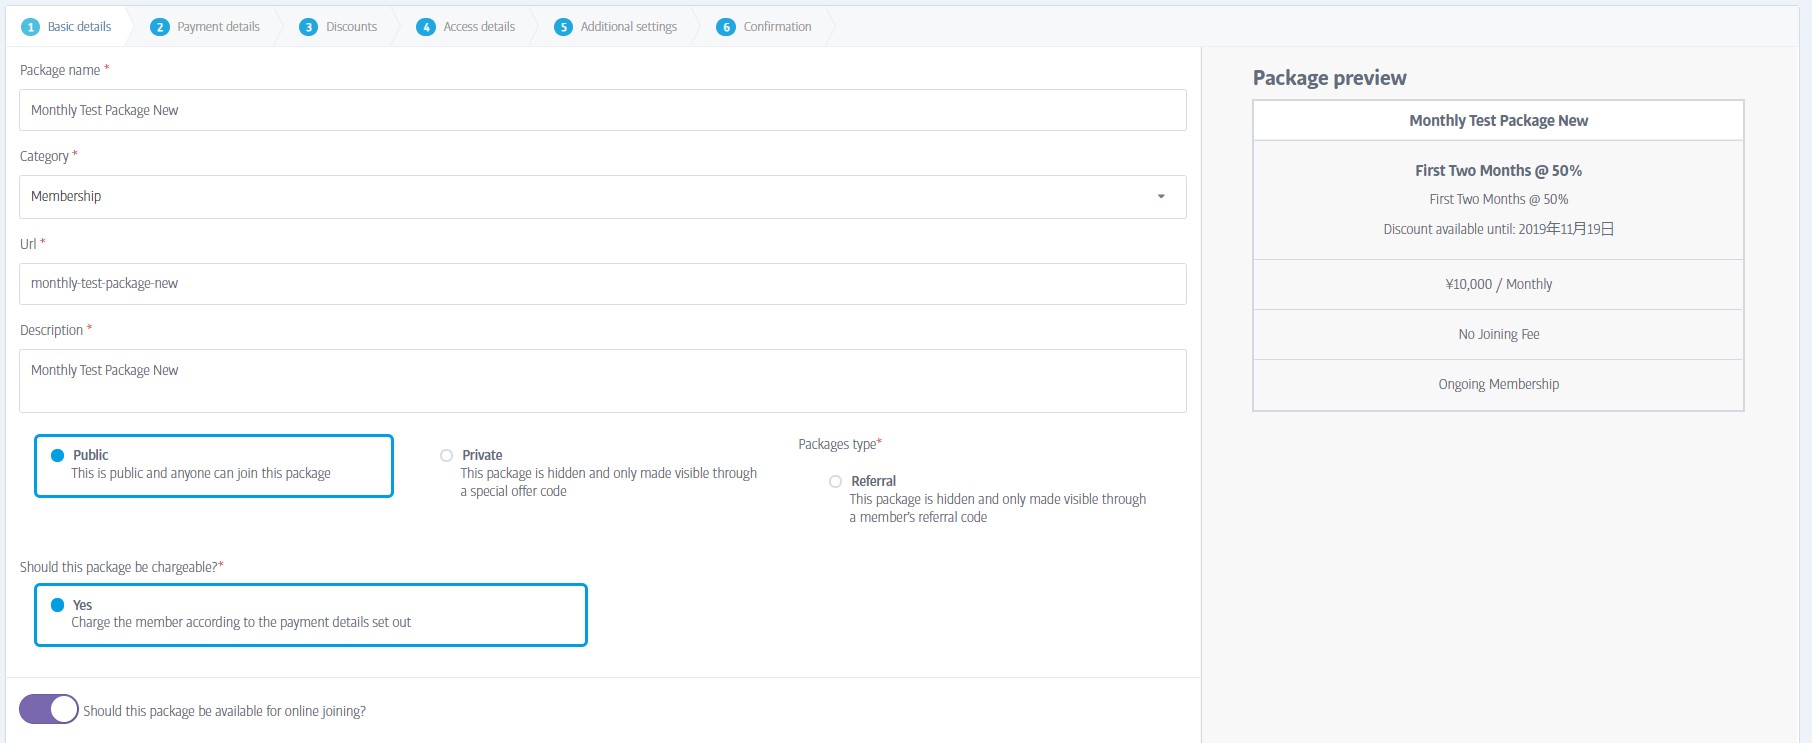
Package Name - The package's name, as it will appear when signing-up.
Category - The type of package - this field is limited to 'membership' at the time of writing, but others may become available.
URL - This is auto-generated, based on the package name so just skip the field. Click on any other field and you will see this one update with a URL derived from the package name you chose.
Description - A reminder of the package's content for staff use.
Type - Public, Private or Referral as already described
Should This Package Be Chargeable? -Choose whether the package is free or not; some installations do not permit free packages and so the option to switch types will not be available.
You will notice that the right of the window shows a preview of how the package will appear on your gym's sign-up page.
Online Joining Switch - if you enable this, the package will be visible to members trying to join online. If you leave this switched off, the package will only be available in-club.
There now follows a variety of product codes and tax type settings used for accounting purposes or to suit territory legislation; the exact types will depend on the specific installation or country. Some of the settings include:
Tax Type - Your club should have one or more types already defined - choose the rate that should apply
Product Code - Choose an (optional) product to associate the package with
Joining Fee product code - For packages that charge a separate joining fee
Key Fob Product Code - For packages that charge for a key fob; choose the correct product code from the drop-down

Payment details
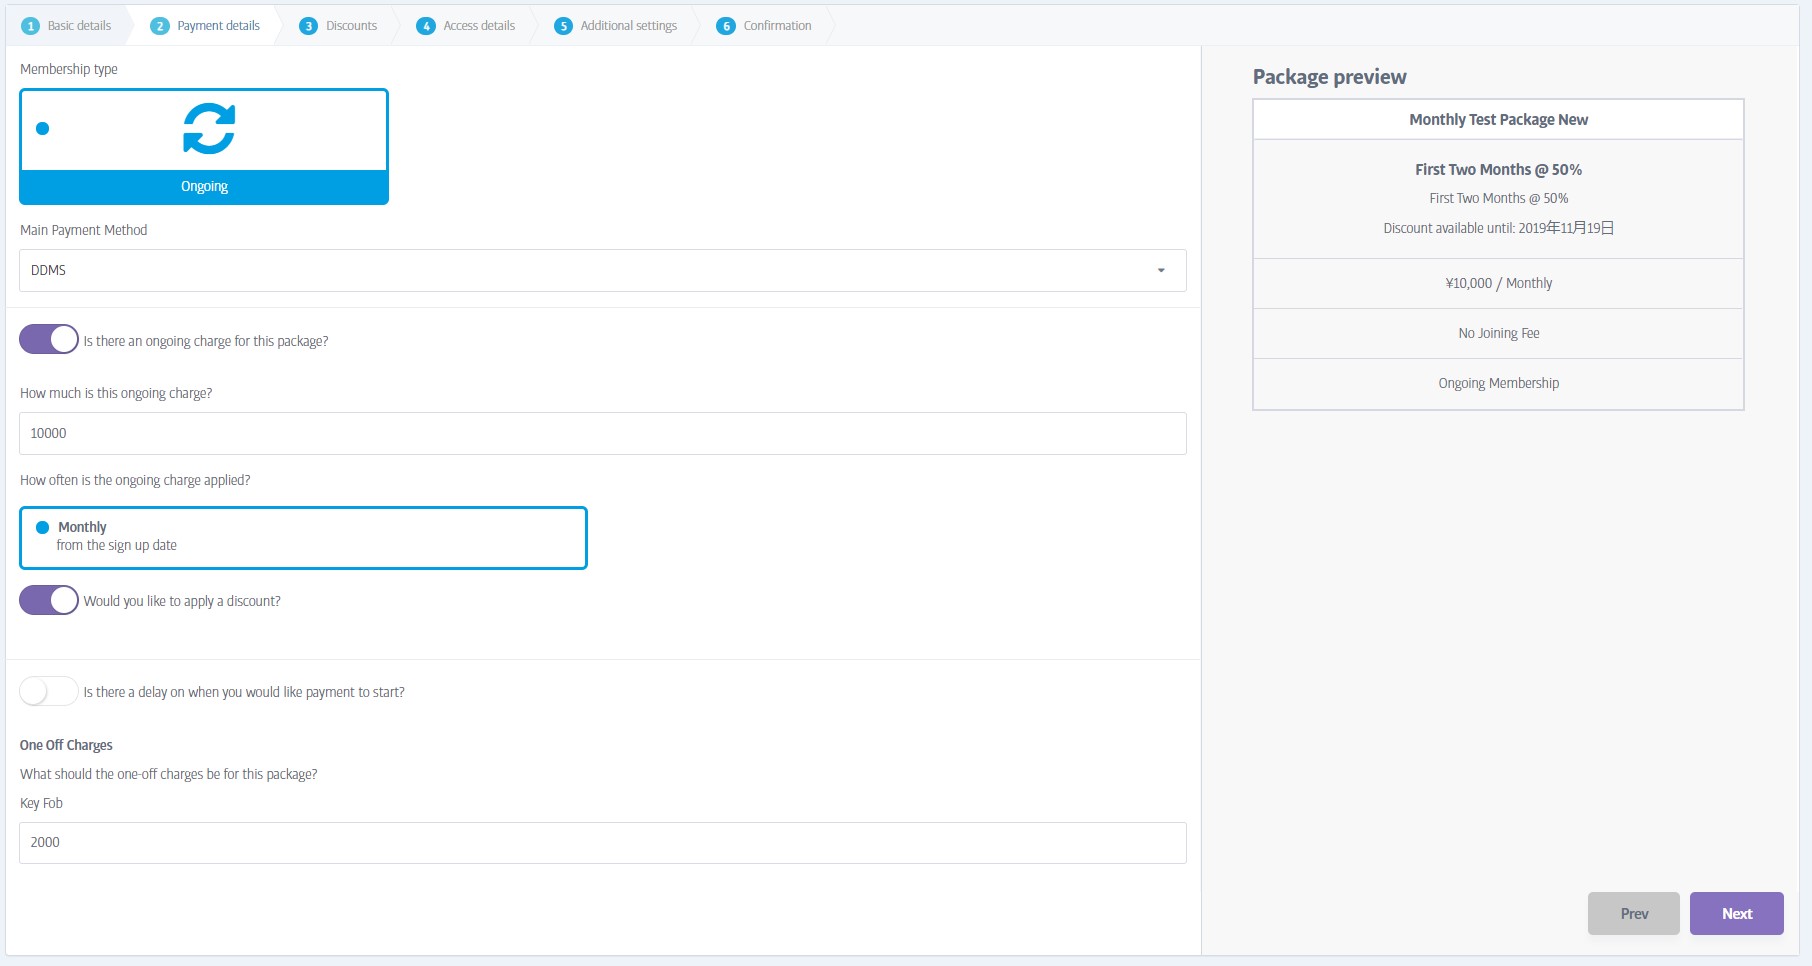
Membership Type - Up to three main types can be available depending on the installation - not all types are available in all clubs. These include Ongoing (eg by regular direct debit), Ongoing and one-off (eg regular debit + up-front charge), or One-Off only (eg up-front charge only).
Main Payment Method - Select the payment company to use, varies by territory.
The remaining fields allow you to define the payment amount, frequency and delay. You can also define any one-off charges or apply a discount.

Discounts
If you could/did apply a discount on the previous tab, the next tab to be displayed allows you to choose which discounts to apply immediately, and which discounts to be scheduled.
Note
This tab is not shown if 1) discounts are not enabled for your software installation, or 2) you do not apply a discount on the preceding Payment Details tab (2), changing the numbering of the remaining tabs/steps.

Access Details
Minimum Contract Length - this specifies the minimum contract length for a membership with an ongoing payment commitment.
Allow access - this determines if the membership allows access to the main exercise/equipment area or not (you might want to create a bookings-only package that excludes access to the main gym, for example)

Additional Settings
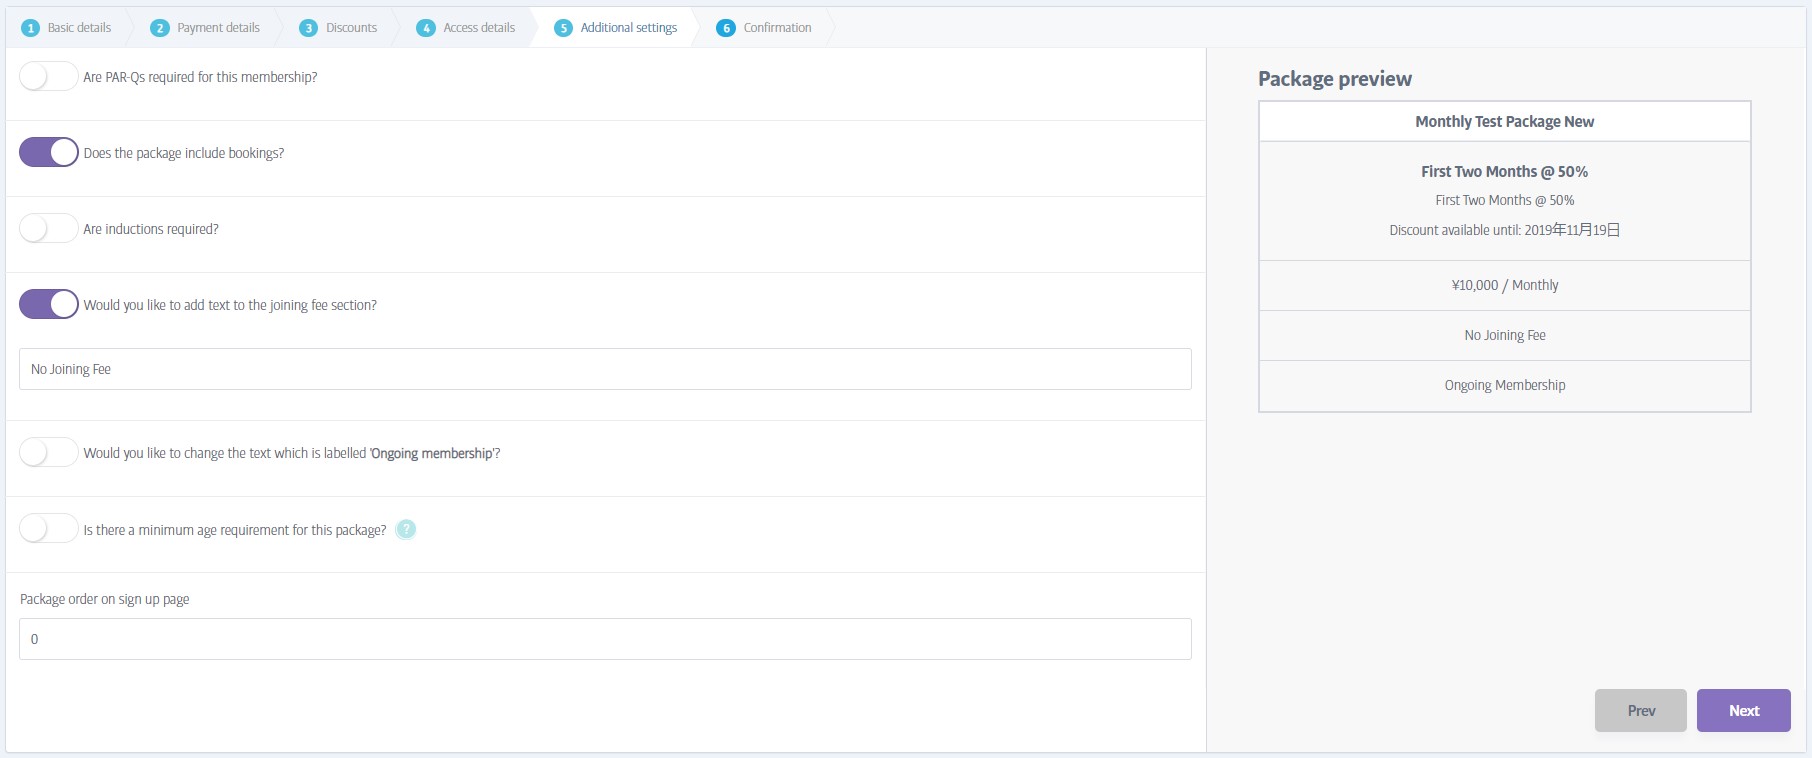
Here you can adjust the finer details of the package by turning features on or off to suit, such as the need to complete a PAR-Q form, minimum age requirements etc. You can also change how some of the text will appear in the package's 'tile' as shown in the preview.
Note
Does this package include bookings?
Memberships can include bookings or exclude them, but exactly how you choose to implement this feature is up to you; an inclusive package could mean that bookings are totally free, or just discounted instead. An exclusive package only means that the member pays a different (and usually higher) rate to join the class/booking in addition to their membership package. They are not forbidden from joining bookings, because all members can view and join active bookings.
So remember; inclusive memberships and exclusive memberships just relate to the prices that each member type will pay to make a booking - see the documentation for the Bookings tab for more details
Note
Package Order On Sign-up Page
'0' is the first package to feature on the sign-up page. As all packages default to '0' when they are created, they will appear in creation order (newest first) instead. You will need to change this value for all active packages if you want to make them appear in a different order.

Confirmation
The final step gives you the chance to review the main settings you made, and gives you a final opportunity to make changes (click on the step numbers to visit previous tabs) before the package is created and offered to members according to the visibility setting you chose.